Scratch Tomato Soup, English Muffin Bread, and Updates!

It has been so long since I have written that I am anxious to even post!   I have changed day-jobs (hooray!), opened the New Year with some new accounts for my husband and my small business (click!) and been on way more voice over auditions then I care to admit. I suppose I didn’t leave myself enough time to blog!

I have written about eating on a budget before (click!), and this post is no exception.  Because I am no longer a waiter (hooray!) and am now a newbie Real Estate Salesperson (click!), I am far from a steady paycheck at the moment.  The pennies really matter lately, and that has prompted me to get creative in the kitchen!  A penny saved is a penny earned, right?  This recipe combo costs us roughly $10, and will probably give us 4 meals!

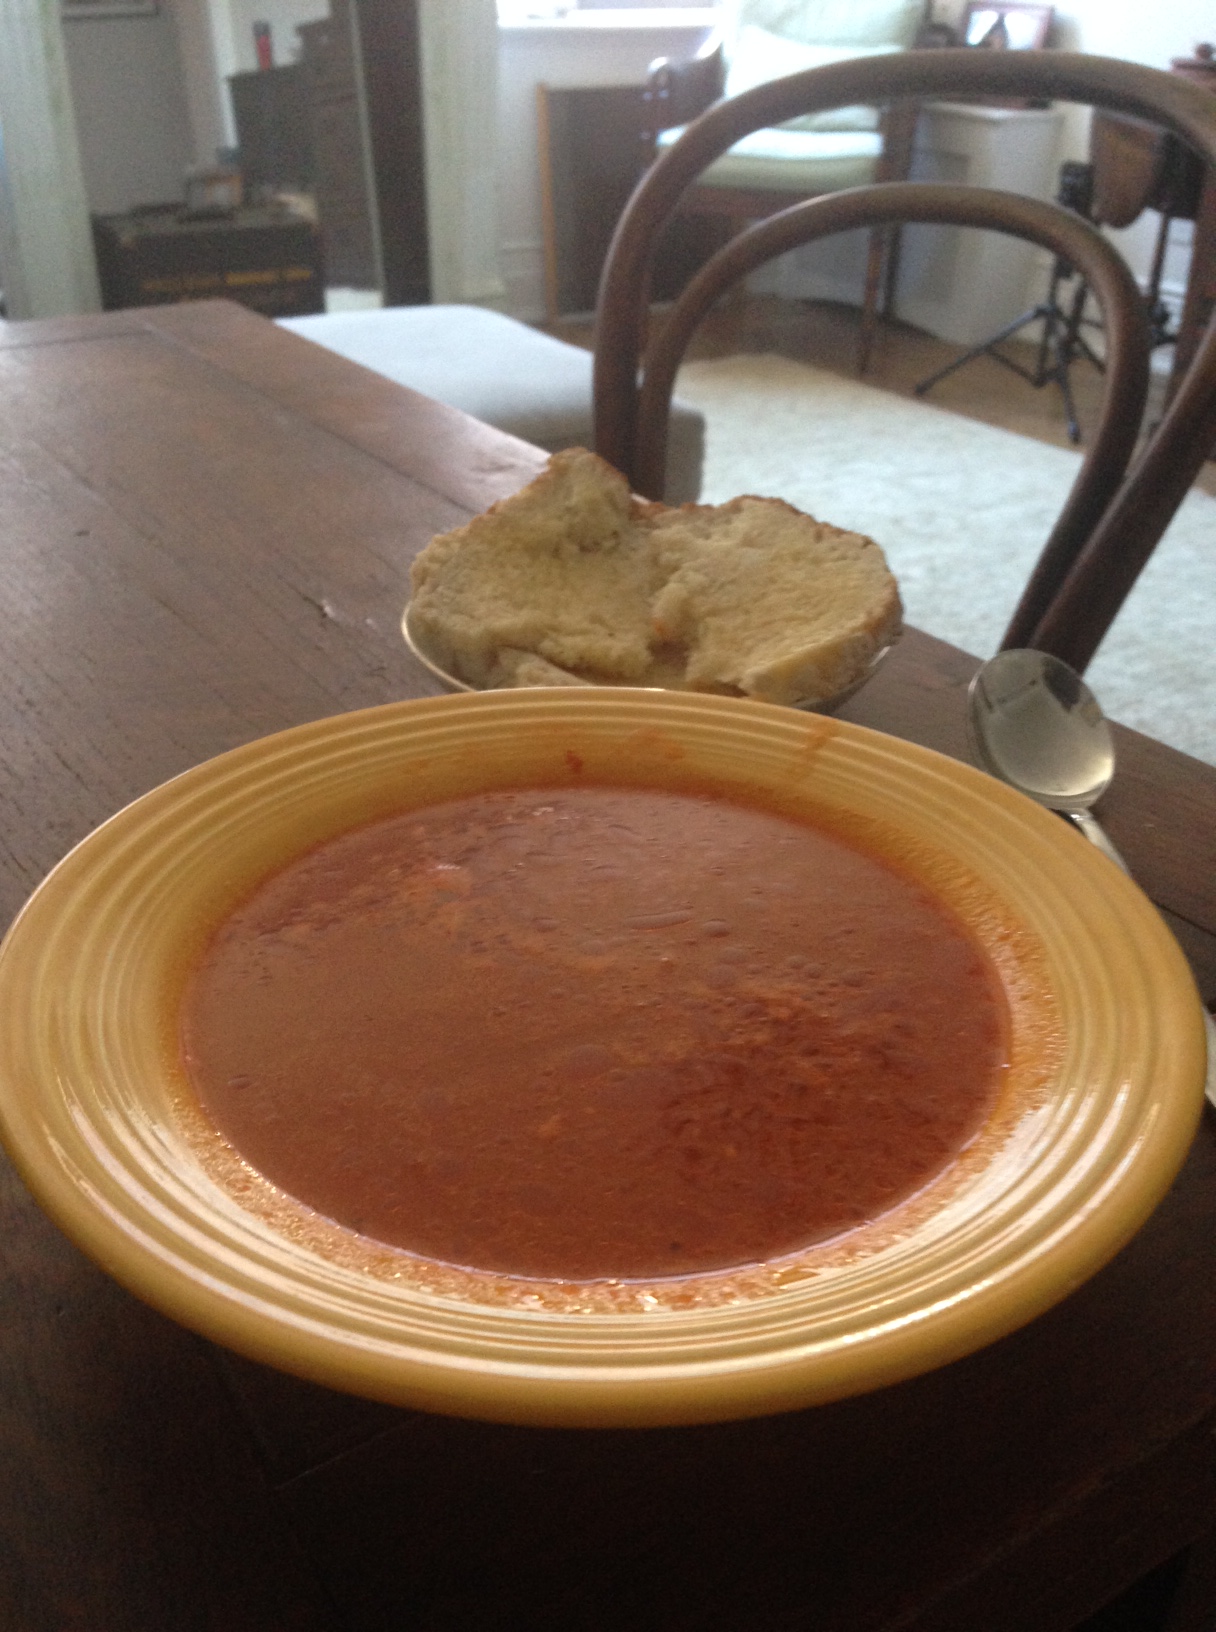
Emily’s Scratch Tomato Soup

photo 2

You will need:

An immersion hand blender (If you don’t have one, get one! You can still make this soup without, but it will be chunky.  But, I mean, chunky is great!)

4 cups of chicken stock. **I make my own!  I roast a chicken every week, and then make stock.  That will stretch your $7.00 bird into 3 or 4 meals!**

2 cans of stewed tomatoes. ** you can also use fresh tomatoes.  I would dice and put in 3 or 4 large ones.

1 can of tomato sauce. (The canned, unsweetened kind.)

1 red onion

2. tbs. sugar

3 cloves of garlic

basil **I don’t usually have this on hand, so go without it.  But it sure makes for a great tomato soup!

Salt and Pepper to taste

and 1/2 c. heavy cream if you’re feeling naughty.

Bring stock to a boil on high heat.  Dice onions and garlic and add to stock.  (Add heavy cream now if naughty!) Reduce heat and simmer for 30 minutes.

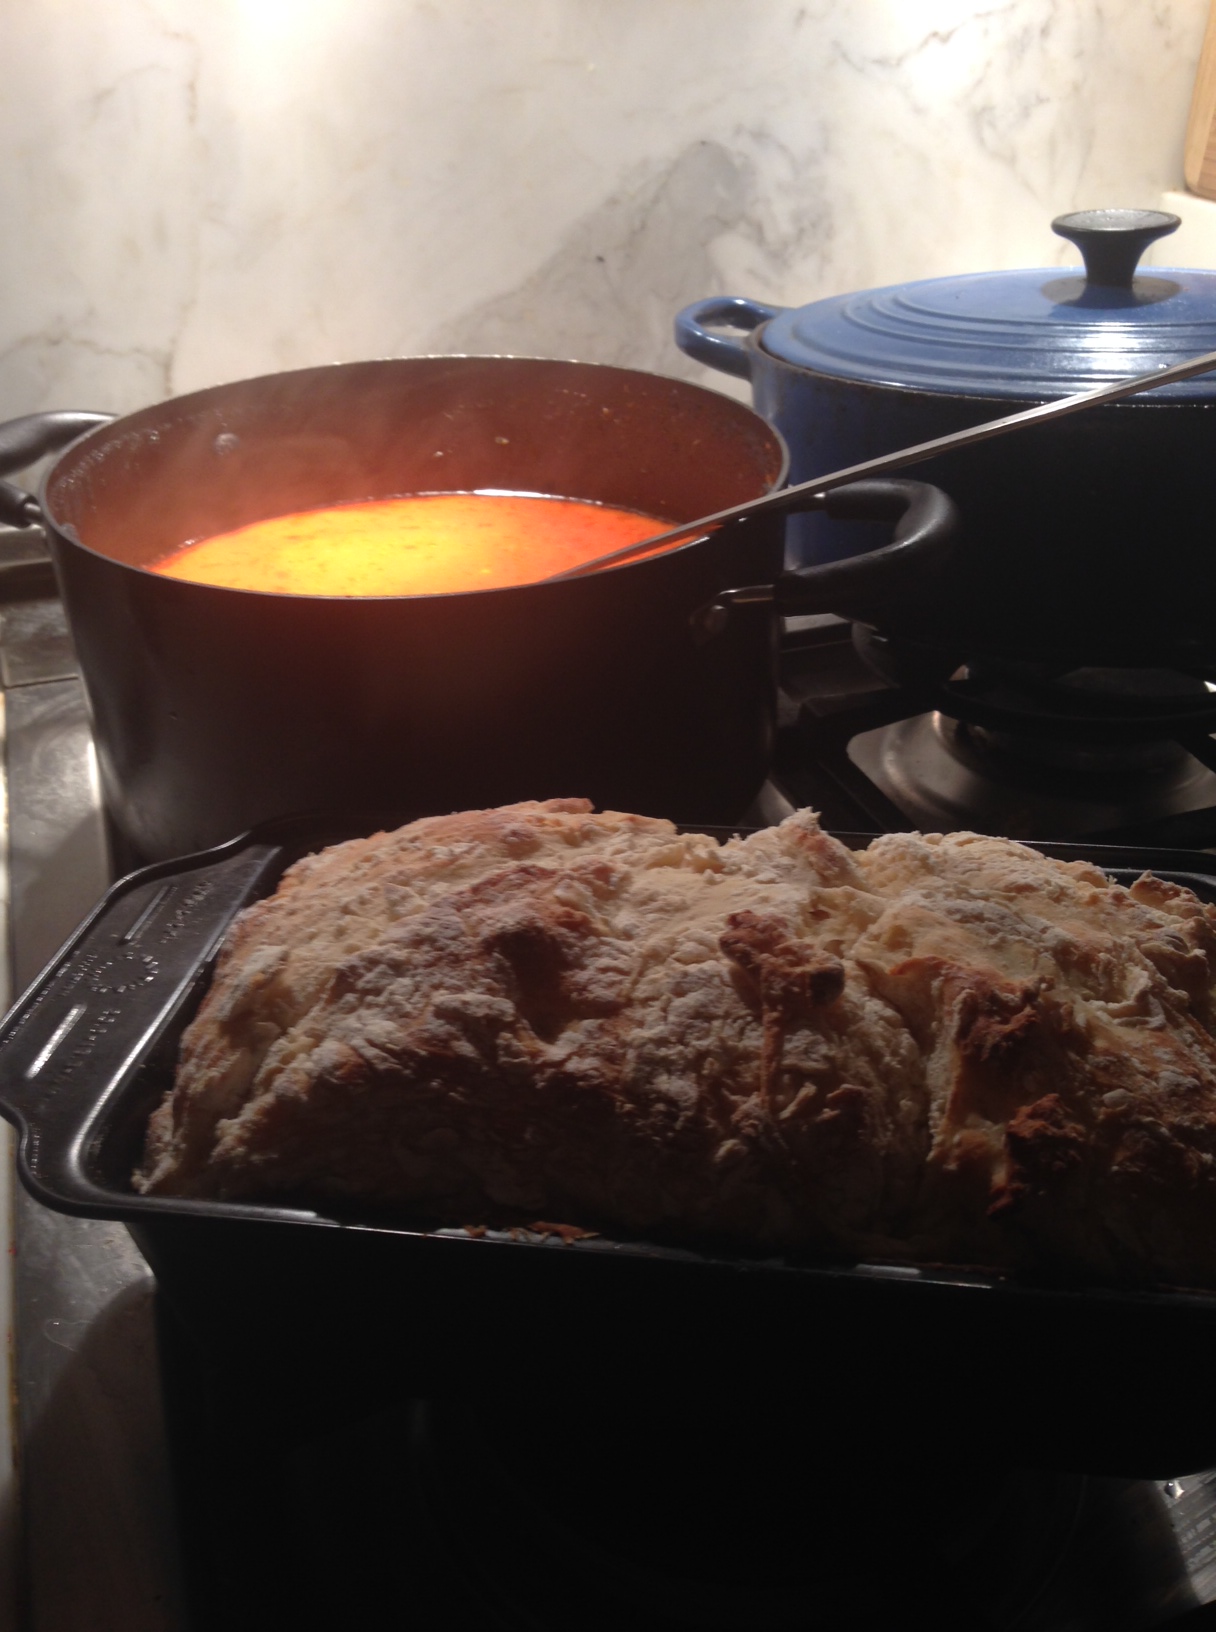
Add stewed tomatoes, tomato sauce and sugar.  Simmer for 20 more minutes. Use a hand immersion blender and blend together.

Add salt and pepper to taste!  *** if you used canned chicken stock, it is most likely already salted.  be sure to taste first! Nobody likes salty tomato soup.

It will taste twice as good the next day after refrigeration!  Yum!

Helpful tips:

Chicken stock can be made out of bones and water alone, and tastes the best if you add onion, celery and carrots to the pot!  You can make great stock by simmering for 2 hours.

If you don’t have enough stock, don’t be afraid to use water!! Did you ever read Stone Soup as a kid?  Water is a great base.  If you have 2 cans of stock, add 2 cans of water!

Also, if you are interested in some more veggies, bring it on! This soup is great with carrots and celery.  Just chop and add when you add the onions!

English Muffin Bread

(Recipe adapted from All Recipes)

photo 1

You will need:

6 c. flour

2 c. milk

1/2 c. water

2 packages of yeast

1 tbsp. sugar

1/4 tsp. baking soda

2 tsp. salt

2 tsp. canola oil

Preheat your oven to 400 degrees.  Heat milk and water on low until hot but not boiling! Hand mix 3 cups of flour, sugar, baking soda, salt and yeast in a big bowl.  Mix well!  Then add the remaining 3 cups of flour. Let sit in a warm area for 45 minutes.  (I like to keep mine right by the stove!  A little trick, preheat your oven to its lowest tempurature and turn it off… then put your entire bowl in the oven! Your dough will double in size!) But the counter-top is great too!

Put in greased bundt pan, and bake for 20-25 minutes or until golden brown!

YUM!!

Helpful tips:

Be sure to mix the first step well… the warm water has to wake up the yeast!

This will be super flour-ey… and that’s ok! Don’t worry if it doesnt mix well.

Don’t use a mixer!

Homemade Crushed Mint Lemonade

You will need:

  • 1 c. fresh lemon juice
  • 1 c. water
  • 1 c. sugar
  • fresh mint leaves

In a large pitcher, muddle mint leaves and 1 tbs. sugar.  On the stove top, heat 1 c. water and 1 c. sugar, until sugar dissolves.  Add water mixture (simple syrup) to pitcher and add lemon juice and crushed ice.  Add 3-4 c. cold water to taste!

If you don’t have crushed ice and want a slushie, crush ice and mint in a blender or food processor and add to the pitcher that way!

Also, this is so wonderful as a cocktail if you want to add gin!

Happy sipping!

photo copy 4


Easy Orchid Care

Can you see the orchid there behind us on our wedding day?  They are so romantic!

Can you see the orchid there behind us on our wedding day? They are so romantic!

Since I started dating my husband four years ago, his ideas about life and love have definitely rubbed off on me.  he loves to recycle, repurpose, and reuse!  For example, we don’t have paper napkins and rarely use paper towels… we use grocery bags as trash bags, and compost our fruits and vegetables. (There is a compost pick up every Sunday here on the UWS!) When we were planning our wedding, he really hated the idea of lots of cut flowers being thrown away at the end of the night.  We decided to have potted orchids at each table, and to keep some, and give the rest away to family and friends!  It worked out beautifully!  Ever since I have been obsessed with my six potted orchids!  I think I have watched every video available on youtube, spoken to every green-thumbed friend I have, and read every blog to find out how to keep these beautiful creatures alive!  I found out a few truly useful tips, and would highly recommend that everyone get one of these beautiful blooms!

  1. Make sure your orchid is potted in moss or bark, or some sort of pre-mixed orchid ‘soil.’  They are used to growing in trees, so their roots want to breathe!  Also, get some fertilizer for them!  20-20-20!
  2. The easiest way to kill an orchid is to over water her.  Water once a week.  The best way is to have your orchid in a pot with holes in the bottom, and to let the water run through.  Don’t let water sit at the bottom!
  3. They like indirect sunlight.  They don’t want to be on a sunny sill, or in a room with no window!  Luckily I have a sill that gets indirect sunlight… hopefully you do too!
  4. If you are comfortable, they are too.  Orchids don’t like to be too hot or cold!  Usually room temperature is best.  Try to keep away from heaters during the winter!
  5. If you’re going to re-pot her, try to only do so after she has flowered!  Also, never re-use old moss.  You also don’t need to ‘pot up.’ You should find a pot that is just big enough for your roots to fit in!  They also love to stick out and soak up the moisture in the air.
  6. If your orchid has flowered  and no longer has any blooms, look on its stem.  Are there any parts that stick out?  If so, you can cut just one inch above the sprout.  That way the orchid will focus on growing and flowering again! If you don’t have any sprouts, you can cut all the way at the bottom of your stem, and wait until she grows back.  Don’t throw away your orchid just because she has stopped blooming!  Her leaves are pretty, too!
  7. ENJOY! I truly have!
the same orchid today!

the same orchid today!

Nanny Biscuits

Nanny Biscuit recipe

You will need: 
2 c. buttermilk
(OR 2 tsp. vinegar and 2 c. milk)
 
5 c. four
1 ½ tsp. salt
¼ tsp. baking soda
¼ c. sugar
4 teaspoon baking powder
1 pkge yeast
¼ c. warm water
¾ c. canola or olive oil
Put your package of yeast into 1/4 c. warm water and set aside.  Combine dry ingredients (flour, salt, baking soda, baking powder and sugar) in a large bowl.  Mix with a wooden spoon.  Make a hole in the center of the mound (a ‘volcano’) and add oil, buttermilk, and your yeast/water mixture. Mix and kneed until you have a ball of dough.  Cover and let rise for 15-20 minutes.  (Or don’t! Ha!)  Using a lot of flour, roll out the dough and cut out biscuit circles.  Bake at 400 degrees for 15 minutes or until golden brown.  You can refrigerate the dough and make biscuits to order, or toast the dough in your toaster oven! You can also freeze the dough and use on special occasions.
For cinnamon rolls, roll out the dough into an oblong piece.  put butter, sugar and cinnamon in center and fold and pinch closed.  Bake at 400 degrees for 15 minutes or until golden brown.  Cut off a piece and enjoy!

Lean Green Bean Casserole

I grew up in the South, and Green Bean Casserole has always been a staple for us!  It usually has cream of mushroom soup, canned green beans and crispy onions on top!  I went on a search for a leaner version, and it was delicious!

You will need:

  • raw Green Beans
  • 2 1/2 cup skim milk
  • 1 large onion
  • 3 tbsp. flour
  • salt and pepper
  • 3 tbsp. olive oil
  • cheese or bread crumbs!

Preheat oven to 425 degrees. Snap green beans and coat with 1 tbsp. olive oil and toss with salt and pepper.  Bake for 20-25 minutes.  Put a sauce pan on the stove top and heat to medium.  Add 2 tbsp. olive oil and diced whole onion.  Stir occasionally, and let onions sweat until translucent.  (They can even brown a little!)  Add flour, salt and pepper. Mix the flour in and cook for about a minute or so. Add milk. Bring the heat to high until the milk boils, then reduce to low to simmer.  Wait until the milk becomes creamy!  Place green beans and milk/onion mixture into a casserole dish, and top with cheese or bread crumbs.  (Make sure to add a little bit of butter or olive oil to the bread crumbs, if you are choosing to use them!  This will keep them moist!)  Broil in your oven for about 5-10 minutes or until the cheese melts or bread crumbs turn golden brown.  Viola!!

A little secret… its really really good the next day, reheated!